Single Page Fold Books
This is the simplest method of home binding, and while it is limiting in format it is a fun and easy craft that requires very little in the way of supplies. If you have a six (6) page story in a vertical format this is a tiny little ashcan you can create with one page of printer paper. This is also a great craft for older kids, since you can fold the booklet and then create the contents when using a single page fold format.
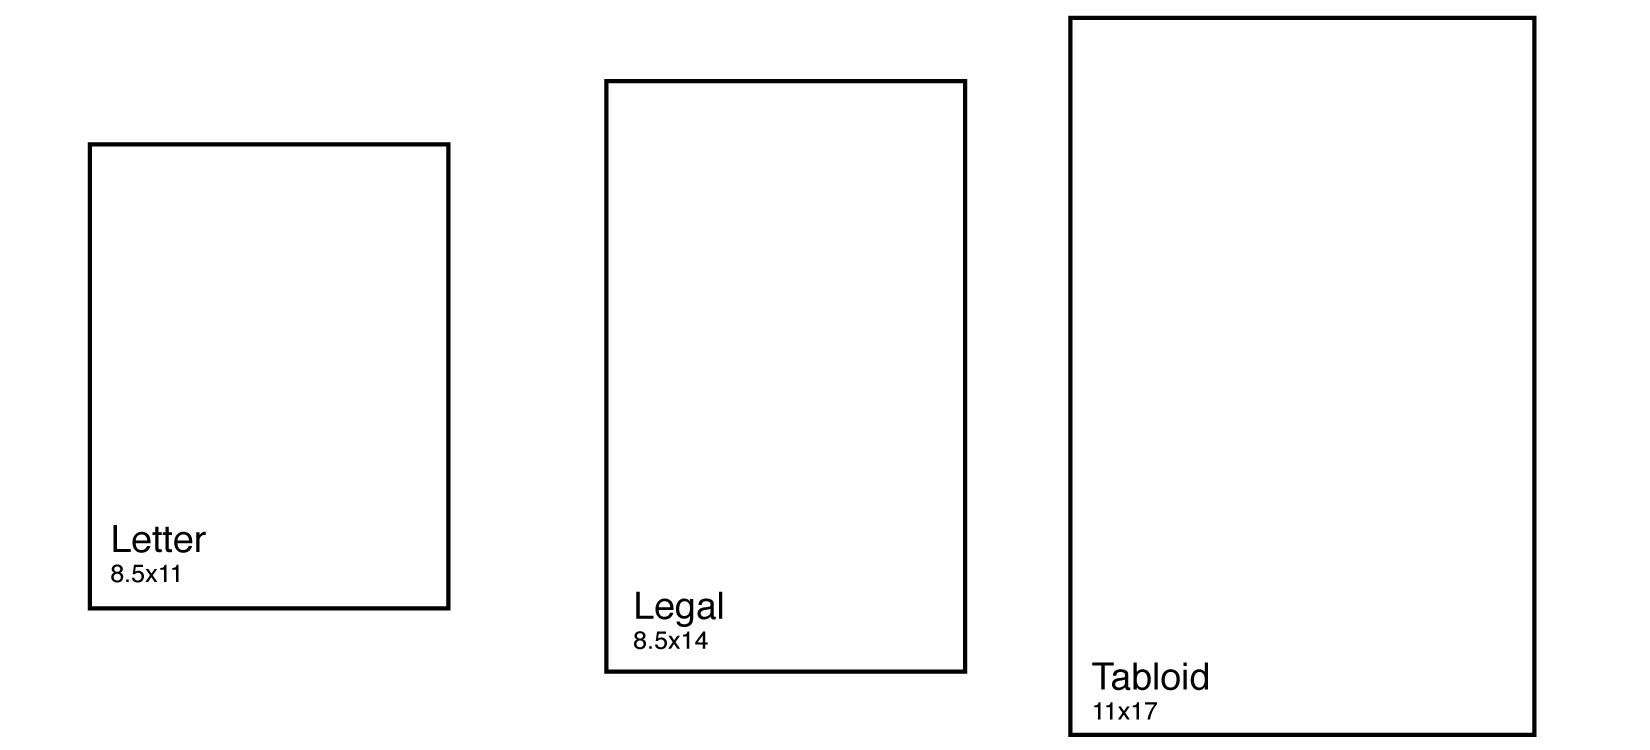
This guide utilizes a standard letter size sheet, 8.5 x 11, but any standard printer paper size larger than that would work; mix it up with legal and tabloid sheets to get different book sizes.
How to Make a Single Page Fold Book
Supplies: Scissors or Xacto-knife/Ruler/Cutting Mat, Bone Folder, & Paper (with or without existing artwork).
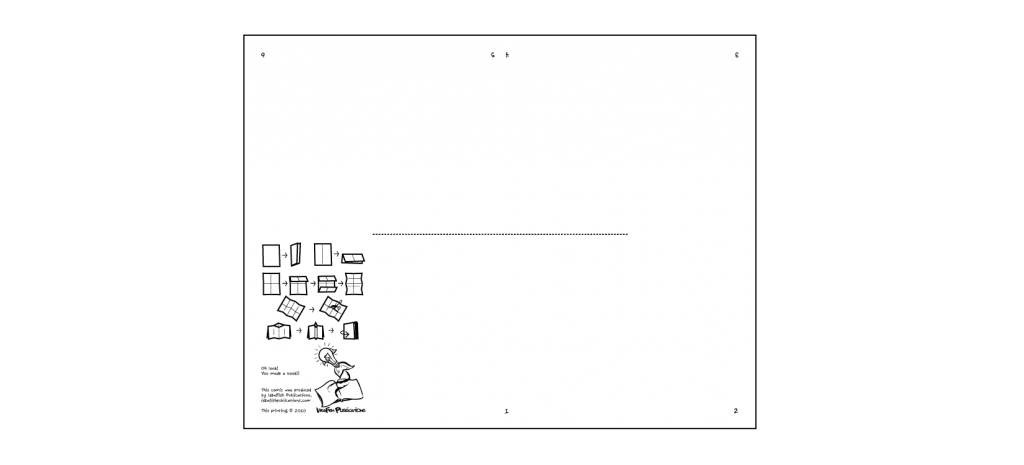
- Start with your sheet of paper, in your choice of size, a letter size template is available for sale here. A package of 10 printed templates is for sale here, it has a mix of blank and text included options for you to create your own original and mad lib comics.
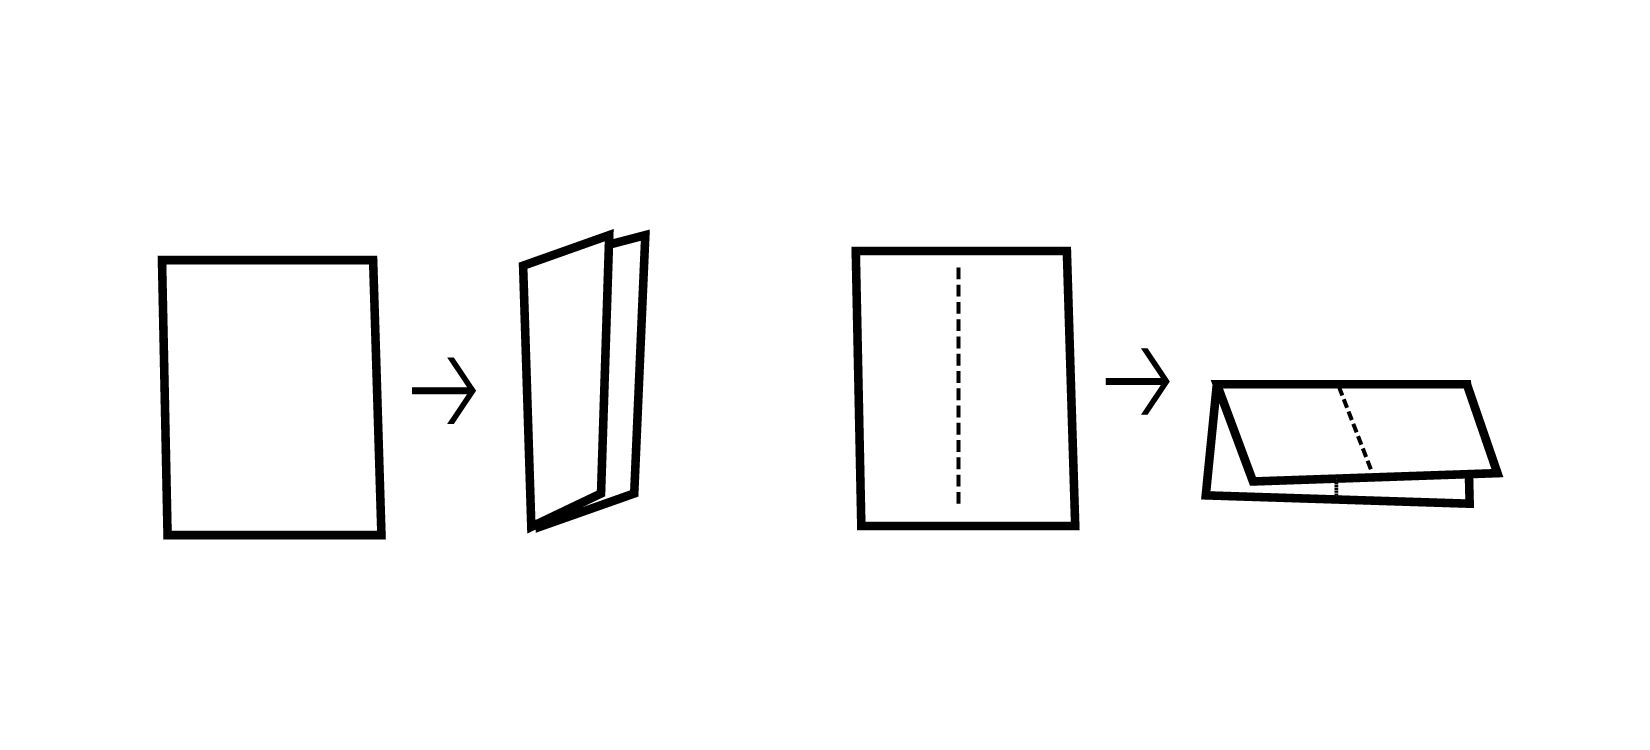
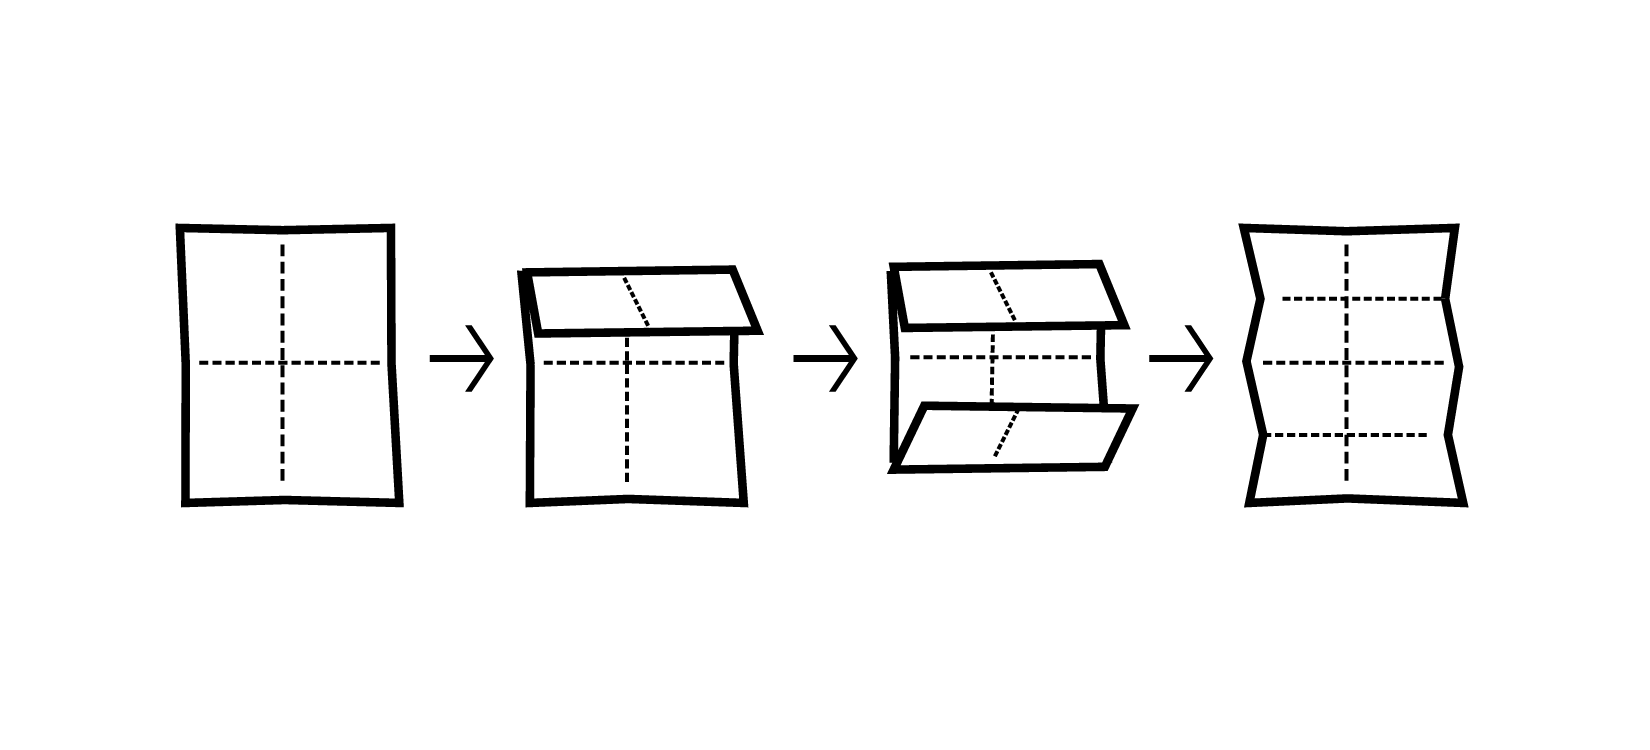
- Fold your paper “hot dog” style, long and skinny, this seam will be the top of the booklet. Then fold it again “hamburger” style, short and squat, this second fold will become the guide for your next series of folds.
- Using your first “hamburger” style fold as a guide, fold the far edges of your paper in to meet it. You will end up with your paper divided into 8 even parts.
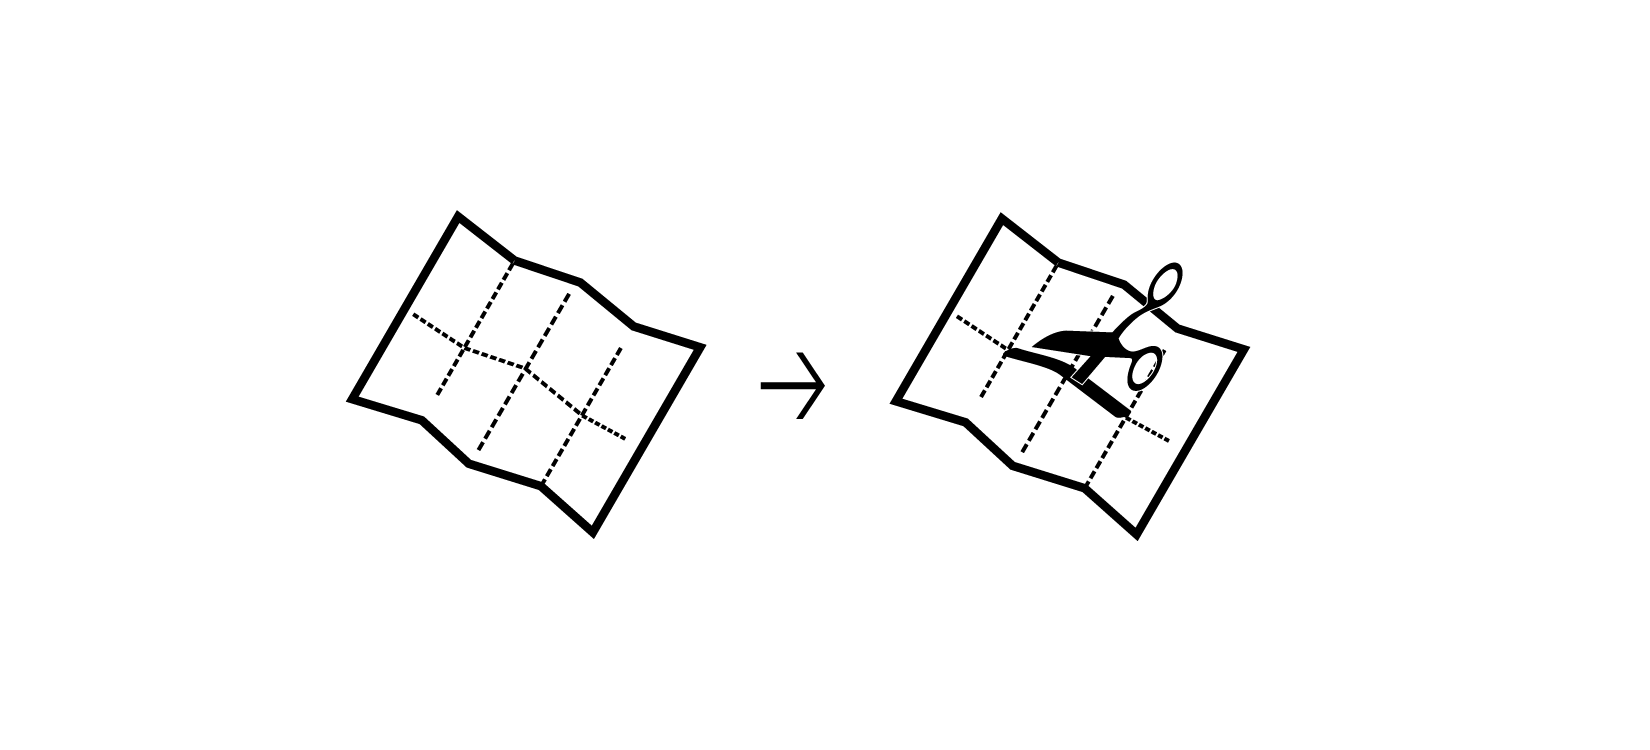
- Along your first fold, the “hot dog” style fold, cut along the seam separating the tops of the interior four parts. This will leave only the furthest sets of pages still attached at the top, and a neat little hole in the center of your paper. You can use either a pair of scissors or your knife/box cutter to make this cut.
- Now you will refold the paper along that “hot dog” fold, which should only be connected on the furthest sets of pages. This fold, with the slit you cut into the paper, is the top orientation of your booklet. Holding the outside pages push inward so that the hole closes on itself and you have an “X” if you look directly down on your project. Then you will find the side with your cover art on it and slowly wrap the pages with cover information around the interior ones.
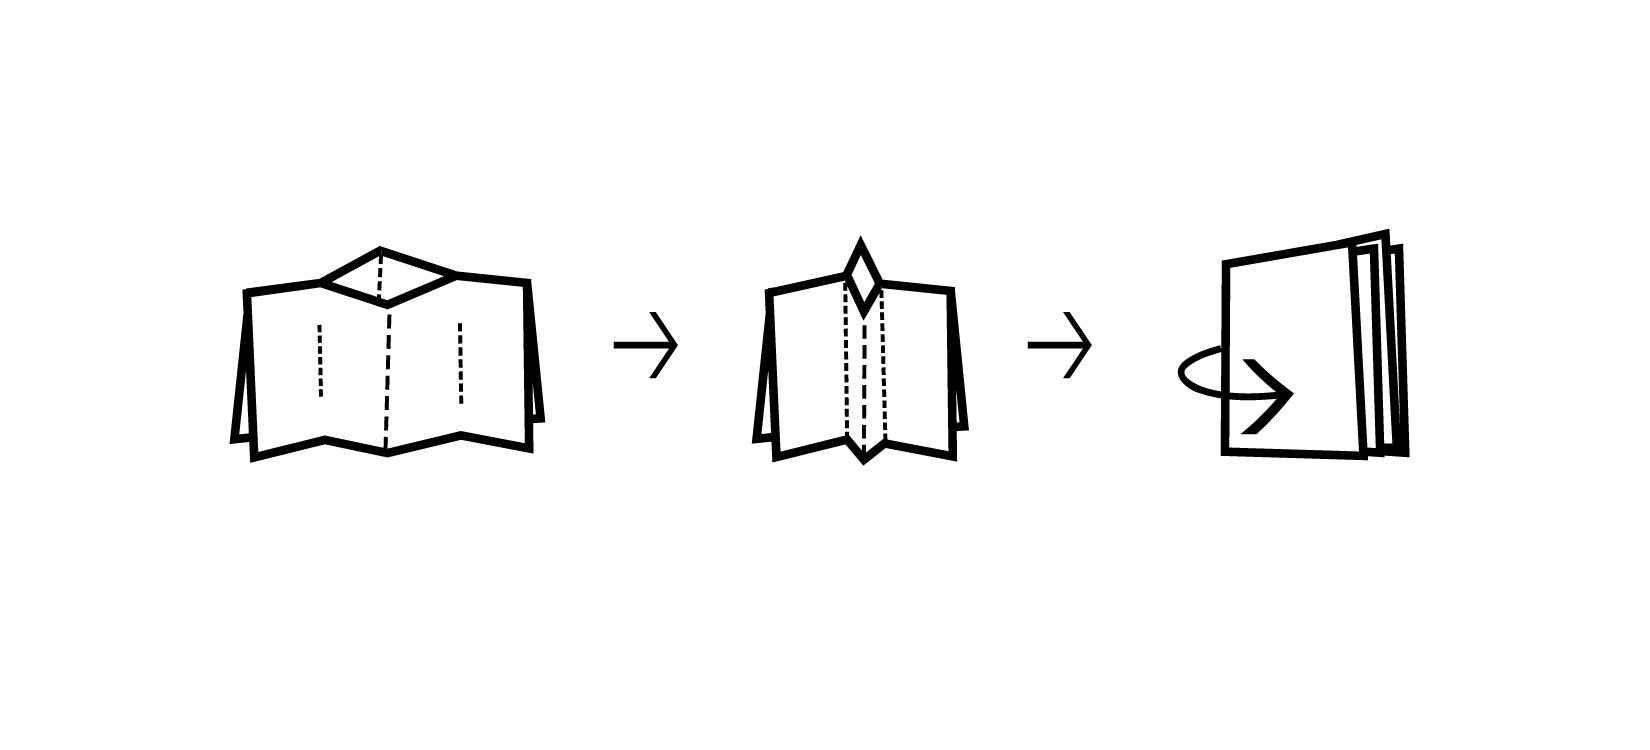
- Your pages should now look like a booklet, you will adjust them as needed so that they lay flat neatly. Use your bone folder to flatten the spine of your booklet as you make adjustments. When everything is lined up to your satisfaction give your booklet a final run over on all sides with your bone folder to keep it together. (Optional step: tape or glue the folds in place, but with gentle handling folding is sufficient.)